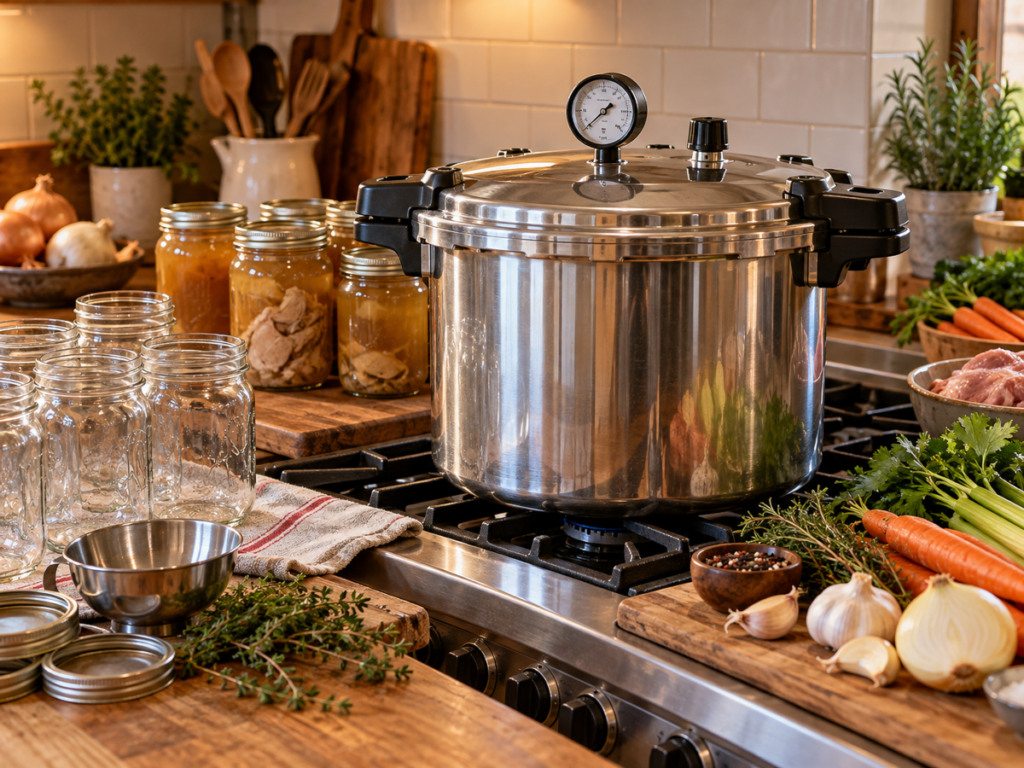
A well-stocked pantry can make everyday cooking easier, particularly when it contains ingredients that usually require hours of preparation. Having jars of tender beef, shredded chicken, or homemade broth available means a nourishing meal can come together without thawing frozen meat, simmering stock all afternoon, or relying on heavily seasoned commercial products.
For people following a low-lectin lifestyle, home canning also offers greater control over what goes into their food. Commercial broths and canned meat products sometimes contain starches, flavoring blends, added sugars, or other ingredients that may not fit personal dietary preferences. Preparing these foods at home allows cooks to begin with familiar ingredients, keep sodium levels manageable, and leave unnecessary additions out.
Pressure canning is especially useful for preserving meat and broth because both are low-acid foods. Their preservation requires specific temperatures, pressures, and processing times to prevent dangerous bacterial growth during storage. Properly handled, these foods can become practical pantry staples that support convenient meal preparation throughout the year.
Why Meat and Broth Require Pressure Canning
Meat, poultry, and broth contain relatively little natural acidity. This creates a food preservation challenge because certain microorganisms can survive ordinary boiling temperatures, even when food has been cooked thoroughly before entering the jar.
One of the greatest concerns is *Clostridium botulinum*, a bacterium capable of producing a dangerous neurotoxin under certain conditions. Its spores can survive boiling water, and the low-oxygen environment inside a sealed jar can support their growth when processing has been inadequate.
According to the Centers for Disease Control and Prevention (CDC) and the USDA, pressure canning is the only recommended home-canning method for low-acid foods such as meat, poultry, and broth. A properly operated pressure canner reaches approximately 240°F to 250°F, depending on the pressure and elevation, allowing tested processing procedures to destroy harmful bacterial spores.
Ordinary boiling-water canning cannot reliably accomplish this. Neither an oven, slow cooker, nor a typical electric multicooker provides an approved substitute for a pressure canner when preserving these foods for room-temperature storage.
A pressure canner is also different from an ordinary pressure cooker. USDA-tested processing procedures are designed around dedicated canning equipment that can hold at least four upright quart-sized jars, with heating, venting, and natural cooling all contributing to the process.
The goal is to maintain the specified pressure for the required time. Increasing pressure arbitrarily or shortening processing times because food was already cooked does not create a validated preservation method.
Choosing Meat for Safe, High-Quality Canning
Good results begin with fresh, properly refrigerated meat. Beef, pork, lamb, venison, chicken, and turkey can all be pressure canned when prepared according to research-tested instructions appropriate to the particular meat.
For red meats, leaner cuts generally work well because excess fat can interfere with jar sealing and affect quality during storage. Tougher cuts that normally benefit from moist cooking can become useful ingredients for soups, stews, and shredded-meat dishes after processing.
Beef chuck, for example, can be cut into manageable pieces and preserved for later use in a vegetable stew. Venison can provide a convenient source of protein for people who prefer wild game, while canned chicken can simplify the preparation of soups and lettuce wraps.
Remove excess fat, connective tissue where appropriate, and large bones as directed by the tested procedure. Use meat that has been handled safely before canning, since preservation is not a way to restore food that has already begun spoiling.
The National Center for Home Food Preservation (NCHFP) provides separate instructions for different types and forms of meat. Whole cuts, ground meat, poultry with bones, and boneless poultry do not all share identical preparation requirements or processing schedules.
That distinction matters because heat moves through different foods at different rates. A dense jar of meat pieces heats differently from a jar of thin broth, even though both require pressure canning.
Hot Packing Versus Raw Packing Meat
Two established packing methods are available for certain meats: hot packing and raw packing. Each has advantages, although the appropriate procedure depends on the food being preserved.
**Hot packing** involves partially cooking meat before placing it into jars. For beef, pork, lamb, veal, and venison strips or chunks, USDA guidance recommends precooking until rare through roasting, stewing, or browning. The meat is then packed into jars and covered with boiling broth, water, meat drippings, or another liquid permitted by the tested instructions.
Hot packing generally provides better liquid coverage and can improve quality during storage. It also makes it easier to judge how much meat will fit into each jar after some of the natural shrinkage has occurred.
**Raw packing** involves placing raw meat pieces directly into jars without precooking. For the same category of red meat strips and chunks, the tested procedure specifies leaving one inch of headspace and adding no liquid. Moisture released during processing creates the liquid found around the finished meat.
Raw packing eliminates the preliminary cooking step, but meat may shrink considerably during canning. Some pieces can end up sitting above the liquid level, which may affect appearance and quality over time.
For red meat strips, cubes, or chunks, both methods use the same tested processing times. Poultry requires its own instructions, including different headspace requirements, and should never be prepared by simply copying the red-meat procedure.
Salt is optional in USDA-tested meat-canning procedures. It contributes flavor rather than serving as the essential preservation mechanism, making unsalted home-canned meat a useful option for people trying to moderate sodium intake.
Processing Times, Pressure, and Altitude
Pressure canning requires accurate control of both processing time and pressure. The size of the jar, food being canned, canner gauge, and elevation all influence the appropriate procedure.
For example, current NCHFP instructions specify the following processing times for properly prepared foods:
| Food | Pint jars | Quart jars |
|—|—|—|
| Beef, pork, lamb, veal, or venison strips, cubes, or chunks | 75 minutes | 90 minutes |
| Chicken or turkey stock and beef stock | 20 minutes | 25 minutes |
These times apply only to the specified tested products, packing methods, and approved jar sizes. They must be paired with the correct pressure for the canner and altitude, and they cannot automatically be applied to other meat dishes, thick sauces, or mixed recipes.
For these procedures, the NCHFP pressure recommendations are:
| Elevation | Dial-gauge pressure |
|—|—|
| 0–2,000 feet | 11 pounds |
| 2,001–4,000 feet | 12 pounds |
| 4,001–6,000 feet | 13 pounds |
| 6,001–8,000 feet | 14 pounds |
Weighted-gauge canners use 10 pounds of pressure at elevations from 0 to 1,000 feet and 15 pounds above 1,000 feet for these recipes.
Processing at higher elevations requires greater pressure because atmospheric pressure decreases as elevation increases. A setting that provides adequate heating near sea level may not produce the same internal temperature at a mountain location.
These figures are useful references, but the complete NCHFP or USDA procedure should always be consulted before canning. Processing directions for poultry, ground meat, seafood, and other preparations may have different times, packing requirements, or restrictions.
Preparing Homemade Broths for Pressure Canning
Homemade broth is particularly appealing for low-lectin cooking because it provides a flavorful foundation for meals without requiring commercial seasoning mixes or starch-based thickeners.
Beef stock can begin with fresh, trimmed bones, while chicken or turkey stock can use carcass bones with the meat removed. The NCHFP stock procedure calls for simmering beef bones for approximately three to four hours, or poultry bones for approximately 30 to 45 minutes, before removing the bones and preparing the liquid for canning.
The broth should be strained to remove bones and unwanted solids, cooled promptly, and skimmed to remove excess fat. An ice bath or appropriately sized shallow containers can help cool stock safely, preventing it from remaining at unsafe temperatures for extended periods.
Excess fat is worth removing for reasons beyond appearance. Fat that reaches the sealing surface of a jar can interfere with the formation of a reliable vacuum seal, and too much fat can contribute to undesirable quality changes during storage.
Once the broth has been prepared according to the tested stock procedure, it is reheated to boiling and packed into appropriate jars with one inch of headspace. The jars are then processed using the pressure and time specified for meat stock.
A broth containing large amounts of meat, vegetables, starch, or other additions should not automatically be processed using the shorter schedule for plain meat stock. Concentrated reductions, thickened preparations, and homemade sauces may require different handling, and some have no established safe home-canning procedure.
Long-simmered bone broth is often valued for its flavor and gelatin content, but a longer cooking period does not establish a new canning schedule. For shelf-stable storage, follow a tested stock procedure rather than assuming every homemade broth preparation can be processed identically.
Equipment Preparation and the Canning Process
A reliable pressure canning session starts before the jars are filled. Inspect the pressure canner, check the condition of its gasket and vent, and make sure the pressure-regulating components are clean and functioning properly.
Dial gauges should be tested for accuracy annually, since an incorrect reading can lead to underprocessing. Cooperative Extension offices in many areas provide gauge testing, and manufacturers can offer guidance for particular models.
Use standard Mason-type canning jars designed for home food preservation, along with appropriate two-piece lids. Check the glass for chips or cracks, use new flat sealing lids, and follow the lid manufacturer’s preparation and tightening instructions.
Once the food has been packed with the required headspace, remove trapped air bubbles where directed and clean each jar rim. Place the lids and screw bands on the jars, then load them upright onto the canner rack with the specified amount of water in the canner.
One of the most frequently overlooked steps is **venting the canner before pressurization**. USDA guidance requires allowing a continuous, visible stream of steam to escape through the open vent for 10 minutes before applying the weight or closing the vent.
This process removes trapped air, which otherwise can lower the temperature achieved at a given pressure. The venting period is separate from the actual food-processing time.
After venting, allow the canner to reach the required pressure. Begin the processing timer only when that pressure has been reached, following the gauge or regulator instructions for the equipment.
Maintain the required pressure throughout processing. If pressure drops below the specified level, return the canner to the correct pressure and restart the full processing time from the beginning.
When processing is complete, turn off the heat and allow the canner to depressurize naturally. Never force it to cool with cold water or by opening the vent prematurely, since rapid depressurization can interfere with proper processing and cause substantial liquid loss from jars.
After pressure has completely returned to zero, follow the recommended waiting procedure, including the additional 10-minute pause before carefully opening the lid. Remove the jars upright with a jar lifter and let them cool undisturbed.
Building Low-Lectin Meals Around Preserved Meat and Broth
The dietary value of home-canned meat and broth largely comes from ingredient control and convenience. Meat itself is not a significant source of the plant lectins typically discussed in low-lectin dietary approaches, so pressure canning meat should not be portrayed as a special lectin-removal technique.
The benefit becomes more apparent when preserved proteins and broths are combined with ingredients selected according to individual food preferences and tolerance.
A jar of pressure-canned beef can form the foundation of a simple stew made with carrots, mushrooms, celery, and fresh herbs. Home-canned chicken can be warmed in broth and served with cauliflower rice, sautéed greens, or properly prepared vegetables.
Broth is equally versatile. It can provide moisture when reheating meat, form the base of a vegetable soup, or replace some of the cooking liquid in grain preparations that fit an individual’s eating plan.
For people who avoid commercial broths containing ingredients such as soy derivatives or starch-based additives, preparing a basic broth at home also makes ingredient selection easier. Reducing sodium is another practical advantage, since seasoning can be added when the food is served rather than during preservation.
However, pressure canning an entire low-lectin meal requires more care than assembling one from separately preserved ingredients. The presence of an acceptable ingredient does not automatically mean it has an approved home-canning procedure.
For example, the NCHFP’s tested soup method does not permit adding pasta, rice, flour, milk, cream, or other thickening agents before canning. Soup jars must be filled no more than halfway with properly prepared solid ingredients before adding liquid, and only ingredients covered by suitable canning recommendations may be included.
A more flexible approach is to preserve plain meat and broth separately, then add vegetables, seasonings, rice, or other preferred ingredients after opening. This allows meals to be customized without changing the tested preservation process.
Checking Seals and Storing Finished Jars
Finished jars should remain undisturbed at room temperature for 12 to 24 hours after leaving the canner. During this period, the contents cool and the lids develop their final vacuum seals.
Do not tighten the screw bands or press the centers of the lids while the jars are cooling. Once the cooling period is complete, remove the bands and check each seal according to recommended procedures.
A properly sealed metal lid should appear slightly concave and should not flex upward when gently pressed in the center. However, a good seal demonstrates that a vacuum formed, not that the food received adequate heat processing. Following the correct canning procedure remains essential.
If a jar fails to seal and the original processing was performed correctly, it can be refrigerated promptly for near-term use or frozen in a suitable container. Reprocessing is possible under specific tested conditions within 24 hours, but it may reduce food quality and must follow the appropriate hot-pack procedure with a new lid.
Wash and dry the exteriors of sealed jars to remove food residue. Store them without screw bands where practical, since this makes failed seals easier to identify and reduces the chance of rust developing around the lids.
The ideal storage location is cool, dark, clean, and dry. The NCHFP recommends approximately 50°F to 70°F for best quality, away from direct sunlight, excessive heat, and damp conditions.
Although properly canned foods may remain shelf-stable beyond a year while their seals remain intact and storage conditions remain suitable, the recommended practice is to preserve approximately what the household will consume within 12 months. Flavor, color, and texture can gradually deteriorate during extended storage.
Label every jar with its contents and processing date. Rotating older jars toward the front of the pantry makes it easier to use preserved ingredients while their quality remains at its best.
Recognizing Problems Before Serving Home-Canned Food
Every jar deserves a visual inspection before opening, even when it was processed correctly and has been stored under appropriate conditions.
Bulging lids, leaks, unusual discoloration, visible mold, or liquid spurting from a container can indicate spoilage. Any jar with these warning signs should be treated as unsafe, and its contents should never be tasted.
The absence of visible spoilage does not guarantee safety. Botulinum toxin cannot reliably be identified by smell, appearance, or taste, which is why a questionable processing history is sufficient reason to discard a jar.
The CDC also recommends boiling all home-canned low-acid foods before eating them. At elevations below 1,000 feet, this means boiling for 10 minutes, with an additional minute for each further 1,000 feet of elevation. This precaution does not make improperly canned food safe, and it must never replace correct pressure processing.
After a safe jar is opened, its contents should be handled like other perishable cooked foods. Refrigerate unused portions promptly and use or freeze them within an appropriate period.
A refrigerator is also the better choice whenever there is uncertainty about whether a particular recipe is suitable for shelf-stable pressure canning. Freezing offers flexibility for homemade mixtures that do not have established canning instructions.
Planning a Pantry Around Real Cooking Habits
The most useful preserved ingredients are usually those that already appear in the household’s regular meals. Someone who frequently prepares soups may benefit from keeping more pint-sized jars of broth, while a household that regularly makes stews might find quart-sized jars of beef more practical.
Smaller jars can also make portion control easier. A pint of broth may be enough to prepare a quick lunch, while opening a quart for a small recipe can create leftovers that need refrigeration.
Keeping a simple pantry inventory helps prevent unnecessary batches. Recording the food, jar size, processing date, and quantity remaining makes it easier to plan future canning sessions around actual use rather than filling shelves with ingredients that seldom leave the pantry.
Seasonal meat purchases and homemade stock preparation can fit naturally into this system. A well-planned batch of plain, safely canned meat or broth provides a starting point for many different meals, with the seasonings and vegetables chosen fresh when it is time to cook.